
Allow Listing by IP Address in Exchange 2013, 2016, or Microsoft 365
The below instructions will show you how to allow list ePHISHiency’s phishing simulation emails by IP address in your Exchange 2013, 2016, or Microsoft 365 environment (the process is the same for all three mail servers, though you may notice some slight visual differences).
These instructions are recommended if you do not have a cloud-based spam filter in front of Microsoft 365. If you do have a cloud-based spam filter, you should allow list ePHISHiency by our IP address in the spam filter, and allow list by header in your Exchange 2013, 2016, or Microsoft 365 environment.
Before you begin:
In alignment with our commitment to advocating for systems that promote equity, inclusivity, and embrace diversity, Hive Systems uses the term “allow list” instead of “whitelist.” Some companies may still refer to it as the latter, but the cybersecurity concept is the same.
You must complete all of these steps to successfully allow list.
Step 1: Set up your IP Allow List
Note: If you are using Exchange 2013, you can set up an IP allow list using the command line by following these instructions from Microsoft.
Log into your mail server admin portal and click Admin.
Click Exchange under Admin centers in the left-hand menu (you may need to click Show all first to see all available options).
Click connection filter beneath protection.
Click the Pencil icon to edit the default connection filter policy.
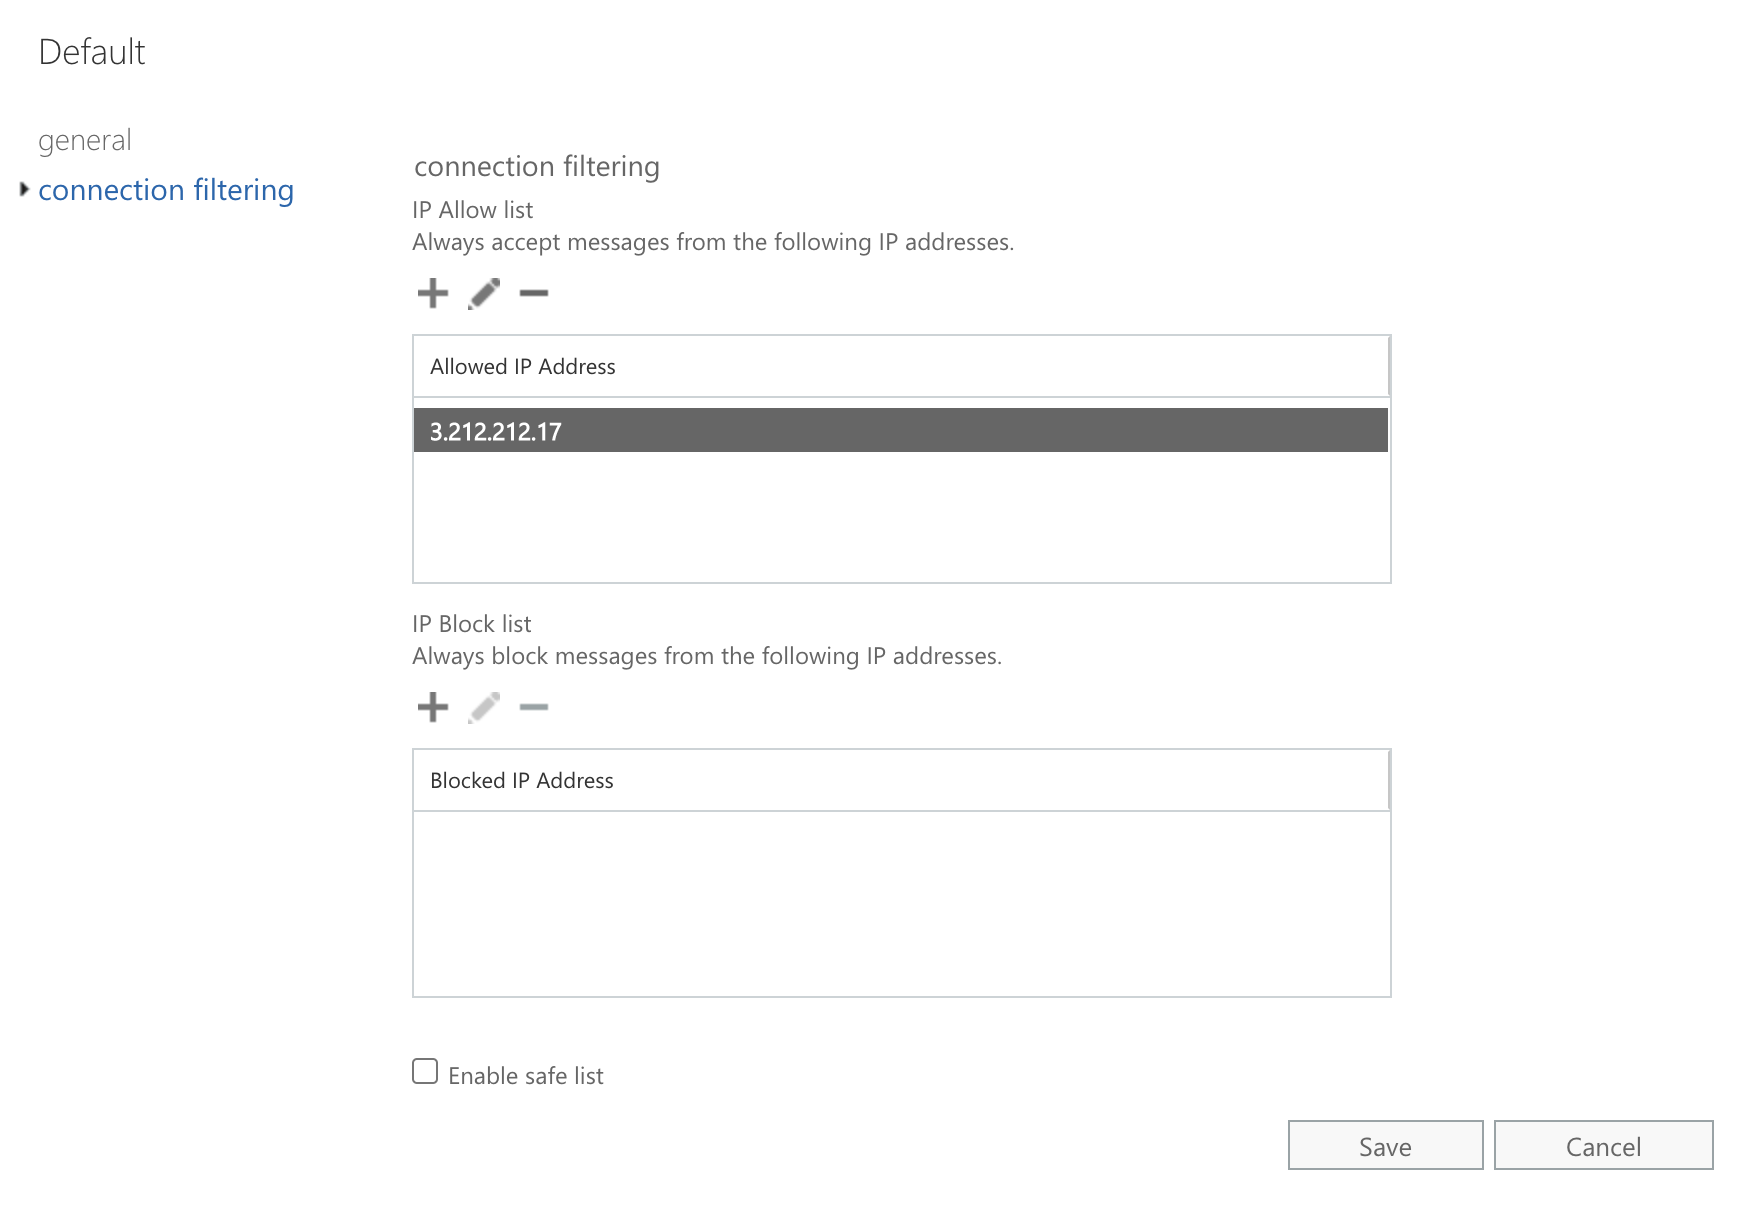
Click connection filtering. Then, under the IP Allow list, click the (+) button.
On the add allowed IP address screen, enter our IP address. For the most up-to-date IP address information, please see this article.
Click OK, then Save. An example of the rule is below:
Step 2: Bypass clutter and spam filtering
From the Exchange admin center, select mail flow from the left-hand menu.
Click the (+) button beneath rules and then select Bypass Spam Filtering…
Give the rule a name, such as "Bypass Clutter & Spam Filtering by IP Address".
Click the Apply this rule if... drop-down menu and select The sender… then IP address is in any of these ranges or exactly matches (you may need to click More options on the New rule screen to see all available options).
Enter our IP address, then click the (+) button and then Ok. For the most up-to-date IP address information, please see this article.
Click the Do the following drop-down and select Modify the message properties then set a message header.
On the right hand side, click the first *Enter text... link (after "Set the message header") and enter the following: "X-MS-Exchange-Organization-BypassClutter" (this field is case sensitive). Once entered, click OK.
Click the second *Enter text... link (after "to the value") and enter "true" (this field is case sensitive). Once entered, click OK.
On the left, click the add action button.
Click the Select one drop-down that just appeared and select Modify the message properties then set the spam confidence level (SCL). Select Bypass Spam Filtering at the top of the list and click Ok.
Leave the remaining options at their default setting and click Save. An example of the rule is below:

If you are using Exchange 2013 or 2016, skip down to Step 5, otherwise continue on to Step 3.
Step 3: Bypass the junk folder
For Microsoft 365 only
From the Exchange admin center, select mail flow from the left-hand menu.
Click the (+) button beneath Rules.
Select Bypass spam filtering....
Give the rule a name, such as "ePHISHiency - Bypass junk folder".
Click the Apply this rule if... drop-down menu and select The sender… then IP address is in any of these ranges or exactly matches (you may need to click More options on the New rule screen to see all available options).
Enter our IP address. For the most up-to-date IP address information, please see this article. Click the (+) button and then Ok.
Click the Do the following drop-down and select Modify the message properties then set a message header.
On the right hand side, click the first *Enter text... link (after "Set the message header") and enter the following: "X-Forefront-Antispam-Report" (this field is case sensitive). Once entered, click OK.
Click the second *Enter text... link (after "to the value") and enter "SFV:SKI;CAT:NONE;" (this field is case sensitive). To learn more about this header, you can read this article from Microsoft. Once entered, click OK.
Leave the remaining options at their default setting and click Save. An example of the rule is below:

11. Back on the rules page, set the priority of this rule to directly follow the rule you created in Step 2 above. An example of this is below:

Step 4: Setting up a connector to prevent deferments
For Microsoft 365 only
From the Exchange admin center, select mail flow from the left-hand menu and select connectors at the top.
Click the (+) button to create a new connector.
In the From field, click the drop-down menu and select Partner organization.
In the To field, click the drop-down menu and select Office 365.
Click Next.
Give the connector a name, such as "ePHISHiency Connector Filter". You can also add a description if you'd like.
When you're done, click Next.
Select the Use the sender's IP address option and then click Next.
Under Specify the sender IP address range, click the (+) button.
On the add ip address screen, enter our IP address. For the most up-to-date IP address information, please see this article.
Click Ok and then click Next.
Make sure the Reject email messages if they aren't sent over TLS option is checked. This option ensures that only emails that are TLS encrypted will be delivered. We send all our emails over TLS because cybersecurity is important!
Click Next and compare your setting to the example below. When you’re done, click Save.

Step 5: Let us know you’re ready!
Contact ePHISHiency support (using the button below) and let us know that you’re all setup. We’ll send a test email to you, or a few people if you want, to make sure everything is working, and then we’ll be on our way to reducing your risk from phishing!


